SAML Authentication
SAML Authentication & Ericom Shield
Ericom Shield supports SAML as an authentication and authorization provider.
Note
SAML authentication in Shield is currently supported in Redirection Mode (proxyless) only
Users can be identified based on SAML and Session Profiles can be assigned based on information from the SAML provider.
When accessing Shield, End users will be prompted to log in to the Identity Provider (IdP). If the end-user has already received a proper SAML assertion from the IdP, they will not need to log in again.
To use SAML authentication, follow these basic steps:
At the Identity Provider (IdP)
- Create a SAML application (for Shield)
- Assign the application to users
- Set Attribute values
In Ericom Shield Admin Console - define the IdP settings:
- Login URL
- Signing Certificate
- Decryption Key
- Audience
Please find detailed instructions for various SAML providers on the menu to the left.
OKTA
Create SAML Application
Create a development/preview account. Follow these instructions .
Log into Okta using an Admin account. Click on Admin .

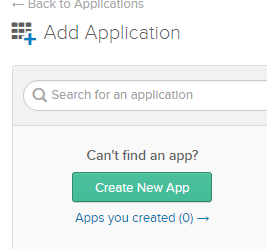
Click on Applications .

Click Add Application and then Create New App .
Choose Web as the type of platform. Choose a SAML 2.0 sign-on method.
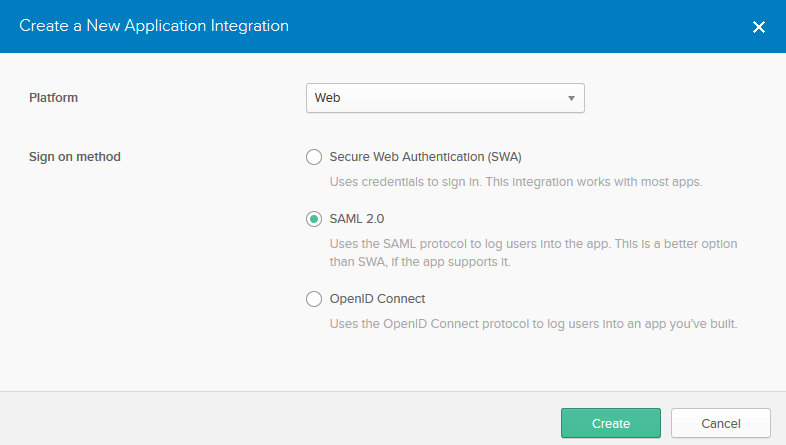
Click Create and complete the next form with the application name, logo, etc.

Configure the SAML settings (name of the field and the value to assign):
Single sign-on URL
https://[proxyless-address:port]/saml/assert
Use this for Recipient URL and Destination URL
Leave the checkbox enabled
Audience URI
https://[proxyless-address:port]/saml/metadata.xml
Default Relay State
https://[proxyless-address:port]/saml/assert**
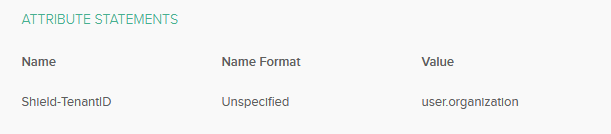
Attribute Statements
Shield-TenantID (Unspecified) / user.organization
See below how to define the Group Attribute Statements
Assign The Application To Group of Users
Create a Group
Go to Directory menu, click Groups.
Click Add Group , enter the name of the group & then click the button Add Group .
In the group, click Manage People and add the users in this group.
Assign the Application to this Group
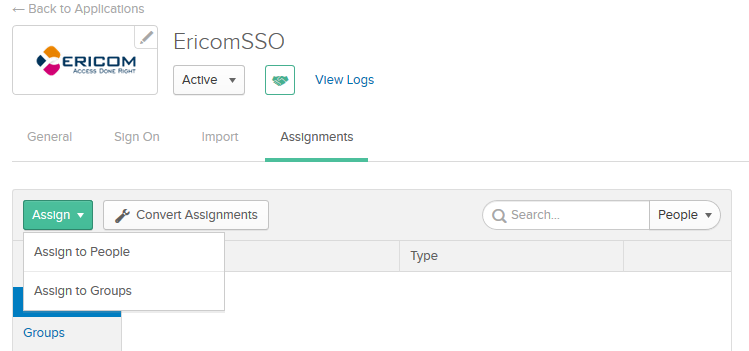
Go back to the SAML application that you created. Go to Assignment tab, click on Assignand then Assign to Group .
Choose the group to assign to, and then click Assign.
Set Group Attribute
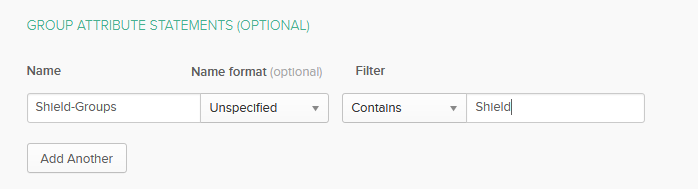
Configure the application to send the group name in the SAML response: In the General tab, under SAML Settings click Edit . Go to the next page. Under Group Attribute Statements add the group:
Add the name of the attribute: Shield-Groups .
Define a filter by which the group name is added.
For example, here we tell the application to include group name that contains the word “Shield”. This means that if the user is a member of group “ShieldUsers” then this group name will be included in the SAML response.
Click Next and Finish .
Set Attribute Values Per User
Configure the tenant ID of the users assigned to the application: In the Directory menu, click People .
Click on a user, go to Profile tab and click Edit.
In the Organization field , set the value of Shield Tenant-ID.

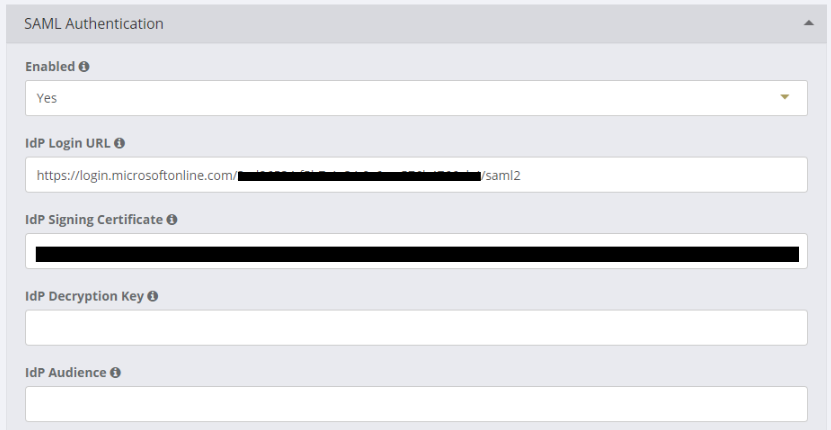
Configure Shield
In the Admin Console go to Profiles > SAML Authentication
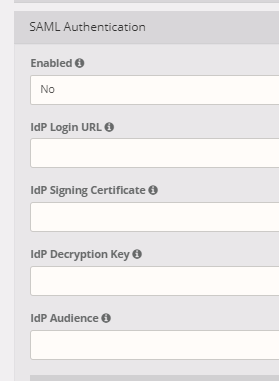
IdP Login URL (required)
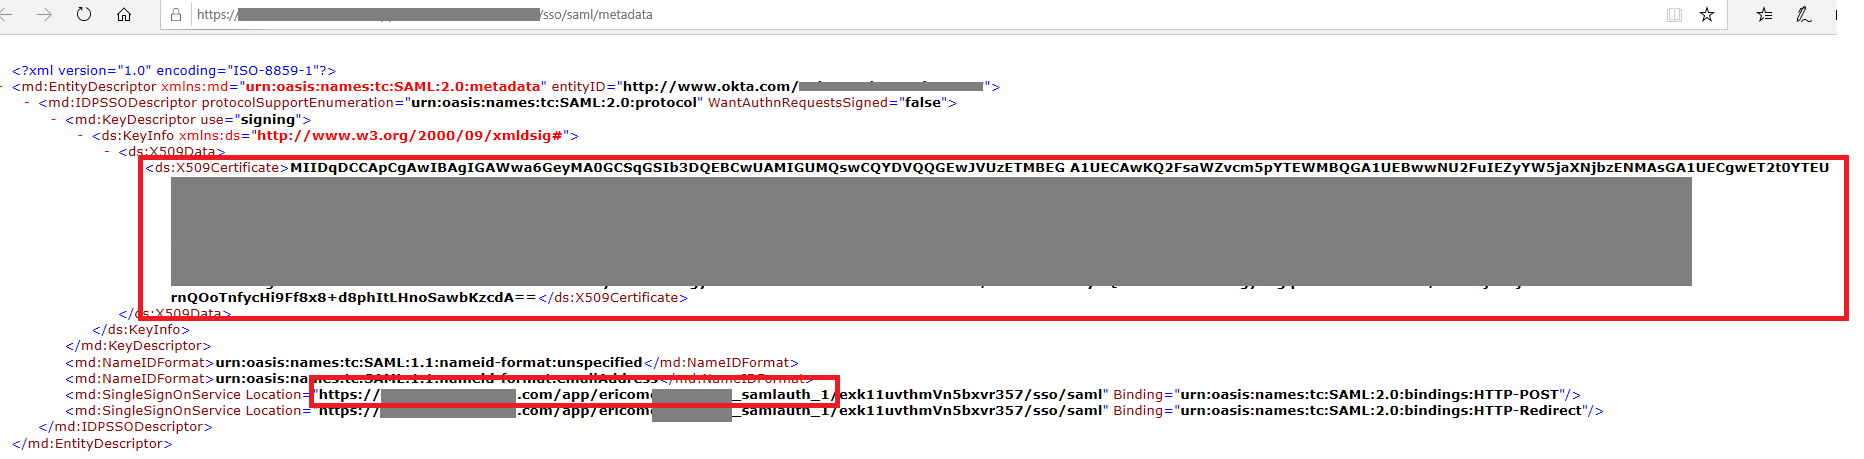
At the Sign On tab at OKTA, find the link Identity Provider metadata . An XML document appears.
Find the tag md:SingleSignOnService and copy the value of the Location attribute.
Paste it into the IdP Login URL field in Shield.
IdP Signing Certificate (required)
In the same XML, find the tag ds:X509Certificate and copy the value of this tag - a base64 encoded string.
Paste it into the IdP Signing Certificate field in Shield.
IdP Decryption Key (optional)
Okta may be configured to send an encrypted SAML response for improved security. To do so, configure a certificate in Okta, and provide its private key to Shield so it can decrypt the SAML response.
Generate A Certificate Signing Request (CSR)
From a command shell, run:
openssl req -nodes -sha256 -newkey rsa:2048 -keyout PrivateKey.pem -out CertificateRequest.csr
Answer the questions about the certificate attributes. Type Enter to accept all default values.
Create a certificate
Use the CSR that you created, sign it with a private key, and create a public certificate.
openssl x509 -req -days 365 -sha256 -in CertificateRequest.csr -signKey PrivateKey.pem -out idp.crt
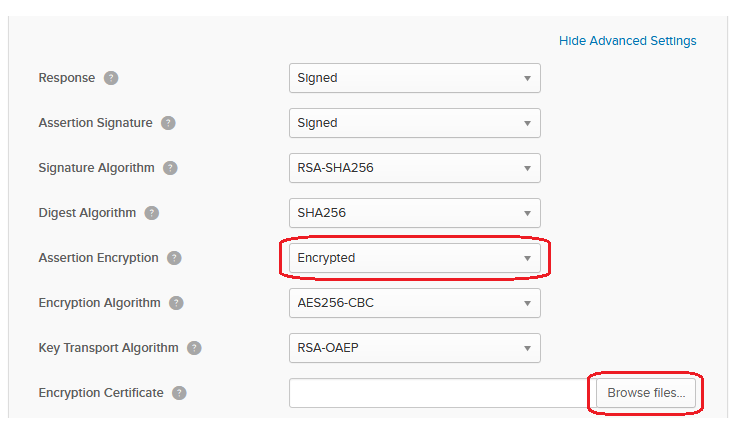
Configure Okta
In SAML Settings , click Show Advanced Settings

In the advanced settings, set the assertion to be encrypted, and upload the certificate (idp.crt in the example above):
Copy the base64 value from PrivateKey.pem .
Paste the string to the IdP Decryption Key field in Shield.
Microsoft Azure
Global Administrator privileges to the Azure subscription are required to publish an application in Azure.
Use the global admin credentials to login to the Azure Portal - here .
Create SAML Application
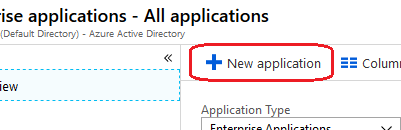
Go to Azure Active Directory and then Enterprise applications :

Choose New application
Choose Non-gallery application
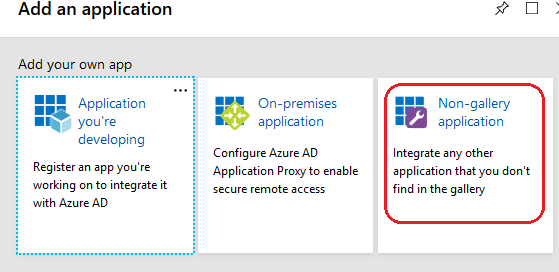
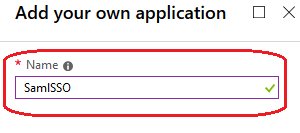
Enter a Name for the application and click Add .
When the application is successfully created, choose Single sign-on .
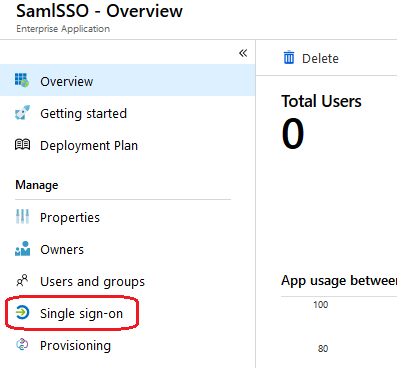
As a sign-on method, choose SAML .

Edit Basic SAML Configuration by clicking Edit (pen icon).
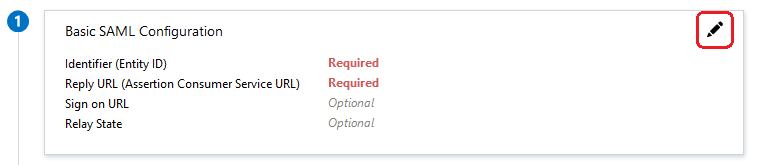
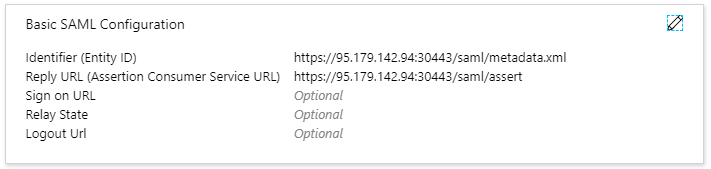
Enter the Identifier* and **Reply URL and then click Save and Close.
- Identifier : https://proxyless-address:port/saml/metadata.xml
- Reply URL : https://proxyless-address:port/saml/assert
For example:
Edit User Attributes & Claims by clicking Edit (pen icon).
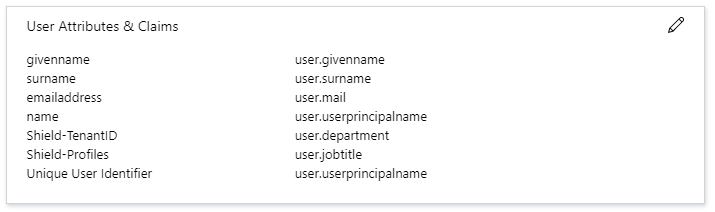
Click Add new claim
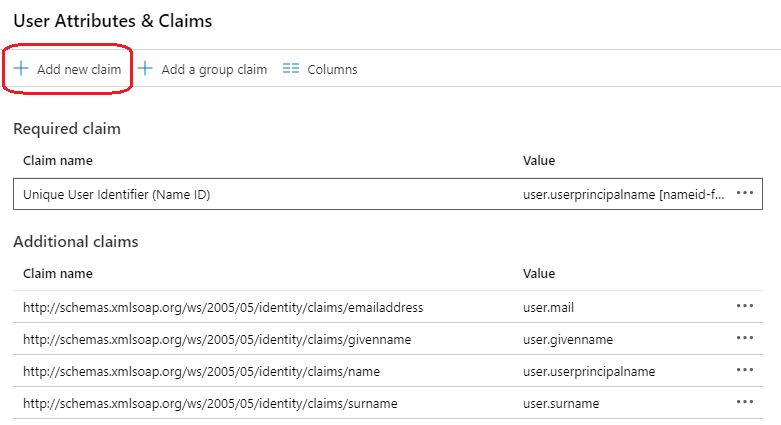
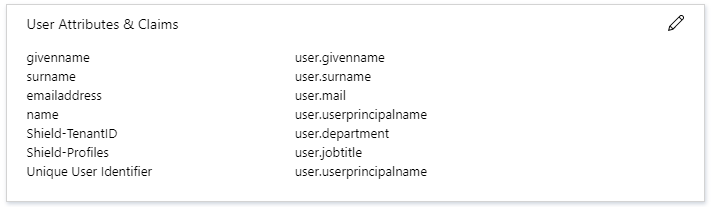
Add the required Shield attributes. In the Name put Shield-TenantID or Shield-Groups. In the Source Attribute put the user attribute that has this value. Click Save and close.
Assign the Application to Users
Click on Users and groups and Add user .
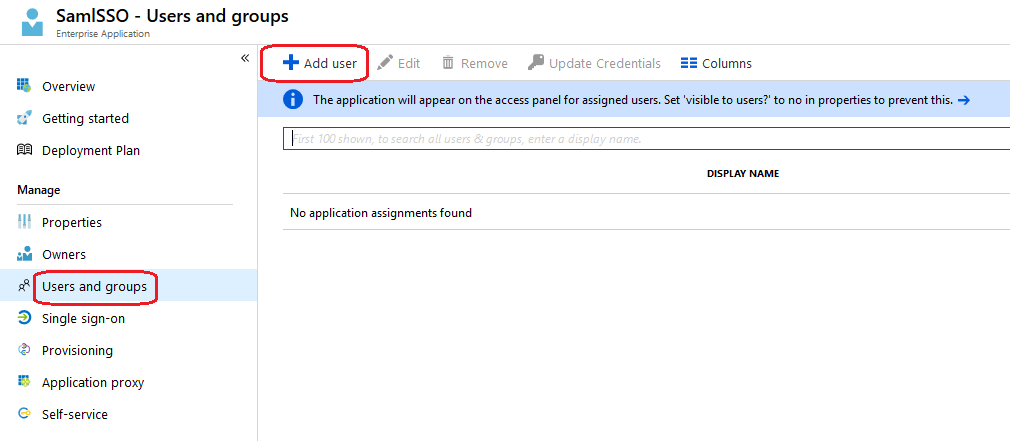
Choose the user or group to be assigned, and then confirm by choosing Select and Assign .
Set Attribute Values Per User
For the users that are assigned to the application, configure their tenant ID. Go to Azure Active Directory | Users | Profile . Edit Job info and in the Department field, set the tenant ID value.

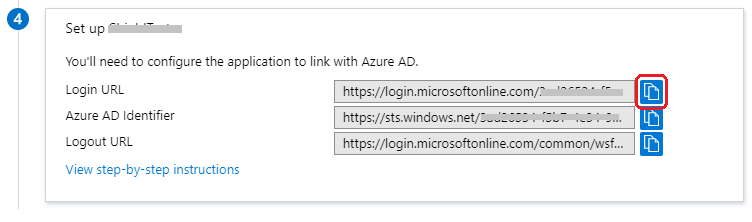
Configure Shield
n the Admin Console go to Profiles > SAML Authentication
Fill in all the required fields (first 3 are mandatory, others are optional):
IdP Signing Certificate (required)
At the Single sign-on tab, under SAML Signing Certificate , find the Certificate (Base64) and download it.
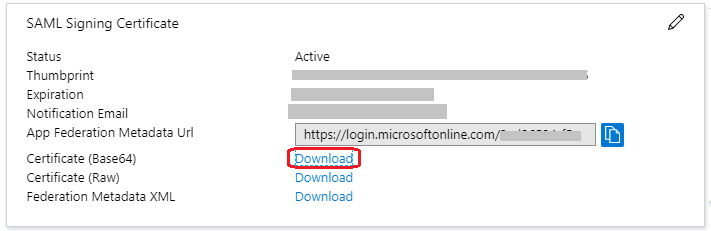
Open this file and copy the base64 encoded string (located between BEGIN CERTIFICATE and END CERTIFICATE ). Paste it into the IdP Signing Certificate field in Shield.
The Admin Console SAML should look similar to